How to copy data from rest API to Azure data lake via Azure Data Factory
In this blog I am going to explain you how to copy data from rest API to Azure data lake using Azure Data Factory.
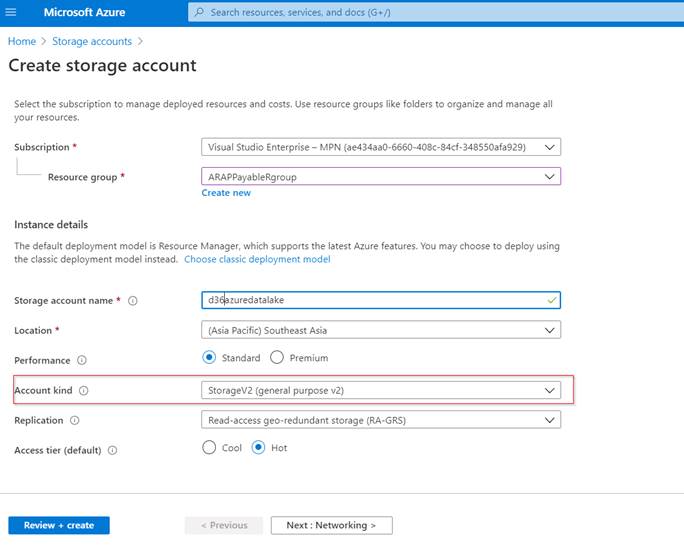
Step 1: Create an azure storage account via azure portal using your credentials.
![A screenshot of a cell phone
Description automatically generated](https://www.cloudfronts.com/wp-content/uploads/2020/08/image-25.jpeg)
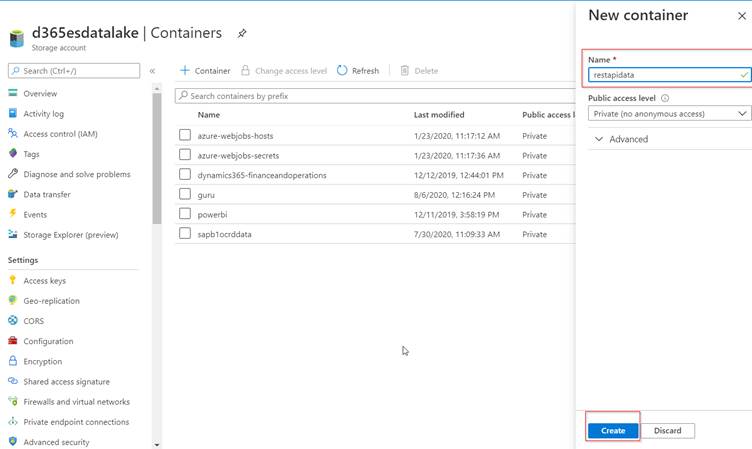
Step 2: Once your storage creation done, create a container called “restapidata” that will going to use to store rest API data.
![A screenshot of a cell phone
Description automatically generated](https://www.cloudfronts.com/wp-content/uploads/2020/08/image-29.jpeg)
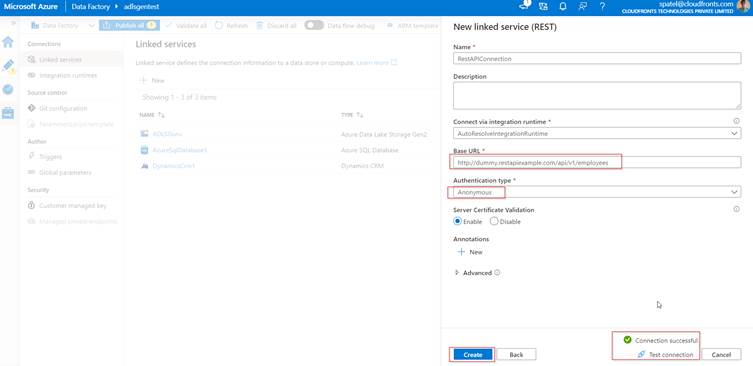
Step 3: If you have rest API endpoint then its fine otherwise search dummy rest api example in google and copy one of the URL. Here I have taken employee endpoint (http://dummy.restapiexample.com/api/v1/employees)
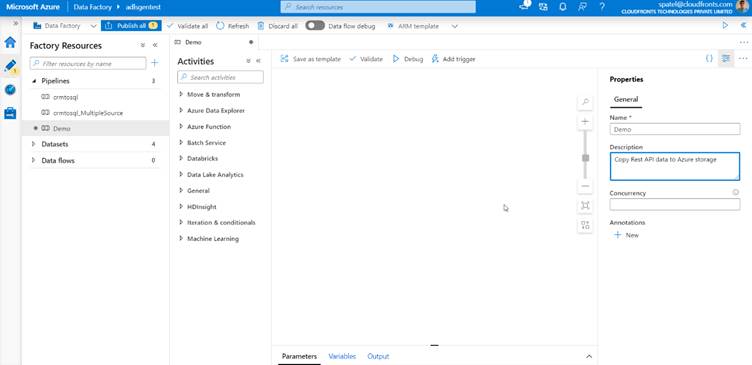
Step 4: Create an Azure Data Factory service in azure portal and create a pipeline.
![A screenshot of a cell phone
Description automatically generated](https://www.cloudfronts.com/wp-content/uploads/2020/08/image-31.jpeg)
Step 5: Create a link service for rest API.
![A screenshot of a cell phone
Description automatically generated](https://www.cloudfronts.com/wp-content/uploads/2020/08/image-28.jpeg)
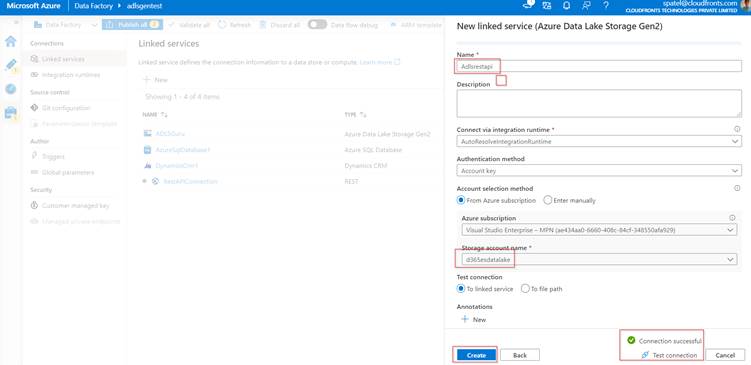
Step 6: Create a link service for Azure data storage.
![A screenshot of a social media post
Description automatically generated](https://www.cloudfronts.com/wp-content/uploads/2020/08/image-32.jpeg)
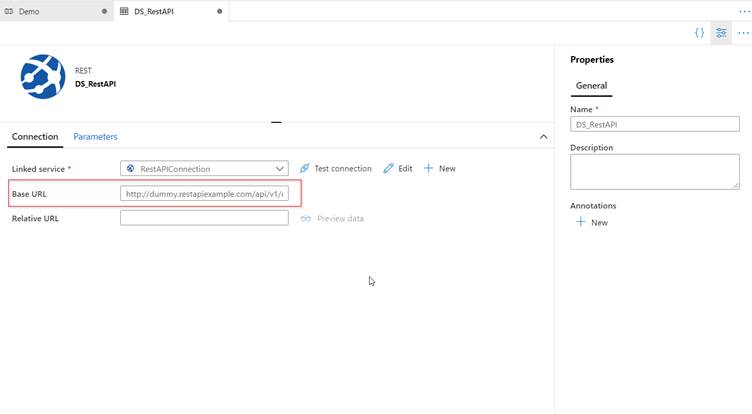
Step 7: Create a dataset for rest API.
![A screenshot of a cell phone
Description automatically generated](https://www.cloudfronts.com/wp-content/uploads/2020/08/image-27.jpeg)
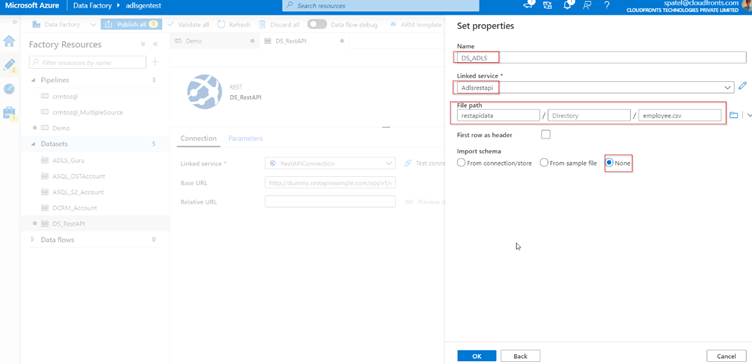
Step 8: Create a dataset for Azure data lake storage.
![](https://www.cloudfronts.com/wp-content/uploads/2020/08/image-22.jpeg)
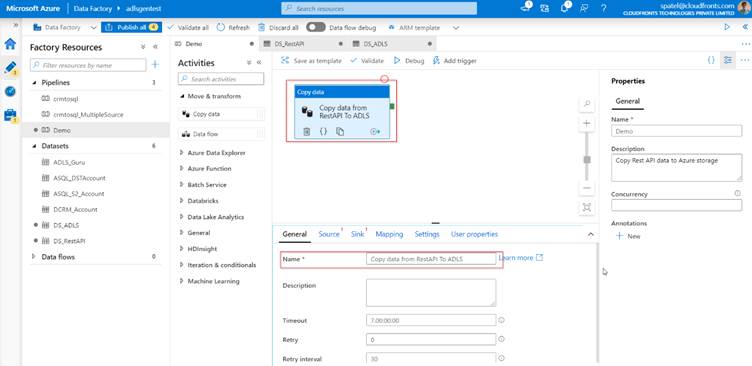
Step 9: Drag a copy activity in the pipeline and set a general property.
![A screenshot of a cell phone
Description automatically generated](https://www.cloudfronts.com/wp-content/uploads/2020/08/image-26.jpeg)
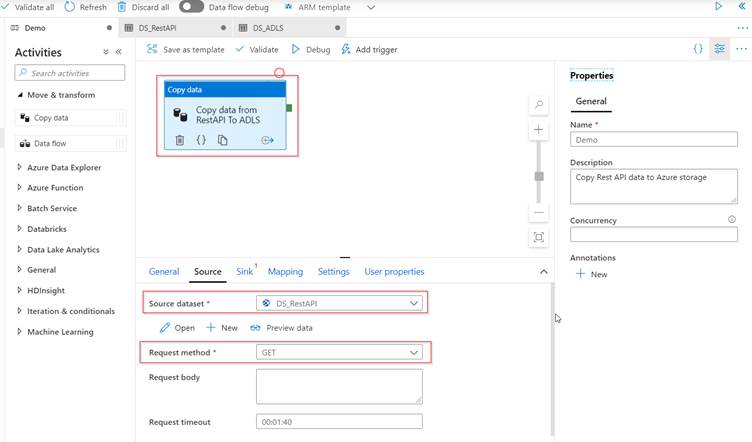
Step 10: Set a source property of copy activity. You can also click on preview data to check whether data is populated or not.
![A screenshot of a social media post
Description automatically generated](https://www.cloudfronts.com/wp-content/uploads/2020/08/image-20.jpeg)
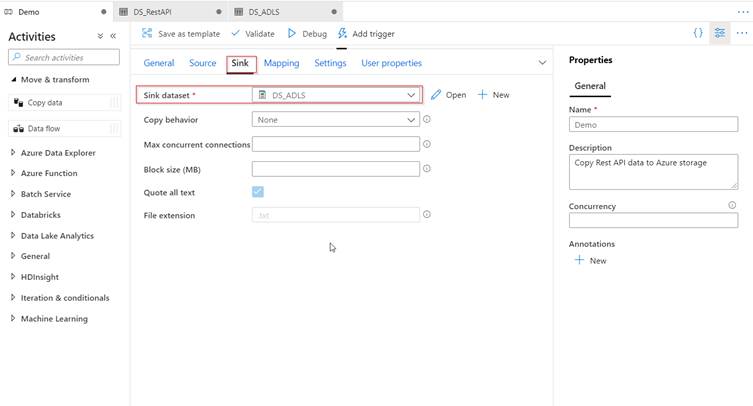
Step 11: Set a sink property of copy activity.
![A screenshot of a social media post
Description automatically generated](https://www.cloudfronts.com/wp-content/uploads/2020/08/image-21.jpeg)
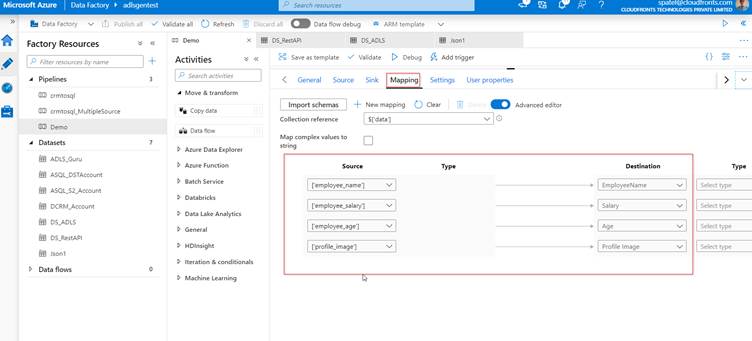
Step 11: Set a mapping property of copy activity.
![A screenshot of a cell phone
Description automatically generated](https://www.cloudfronts.com/wp-content/uploads/2020/08/image-23.jpeg)
Step 12: Debug the pipeline and check the output.
![A screenshot of a cell phone
Description automatically generated](https://www.cloudfronts.com/wp-content/uploads/2020/08/image-24.jpeg)
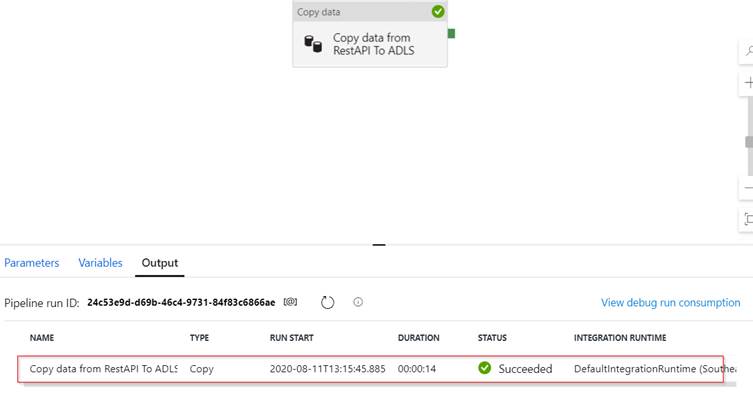
Also click on details to check record proceed.
![A screenshot of a cell phone
Description automatically generated](https://www.cloudfronts.com/wp-content/uploads/2020/08/image-30.jpeg)
I hope this will help you.