Creating Custom Connector for Shopify in Power Automate- Part 1
In this blog we’ll learn how to create a custom connector for Shopify using Power Automate.
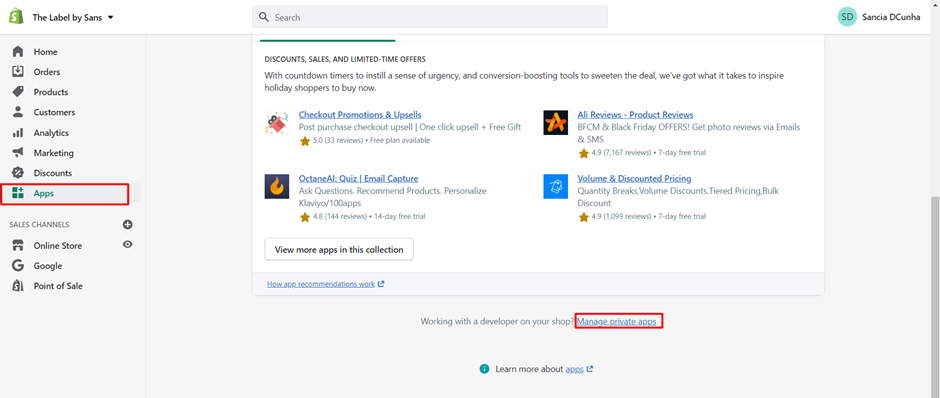
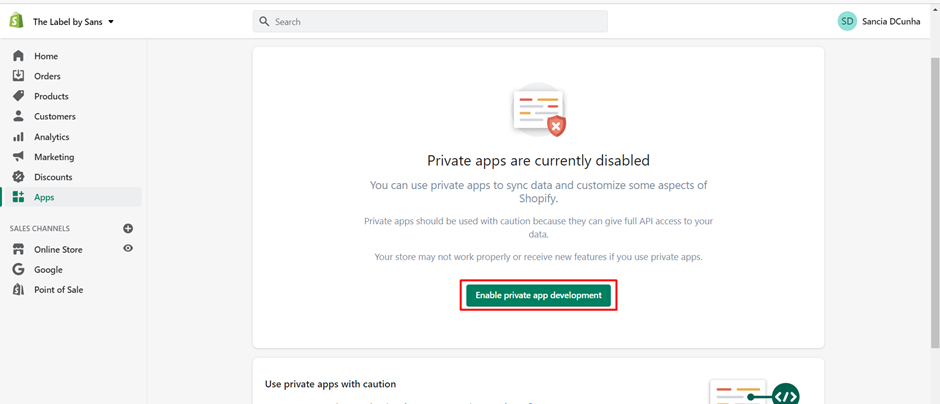
- Go to Apps and click on “Manage Private Apps”
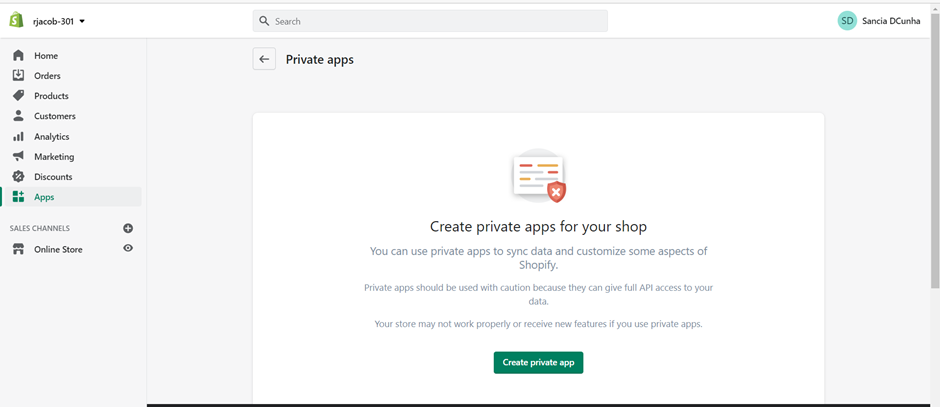
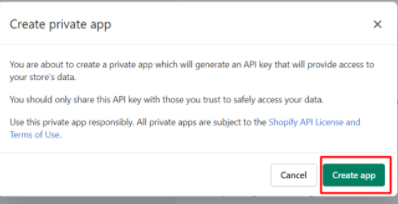
2. Create on “Create private app”
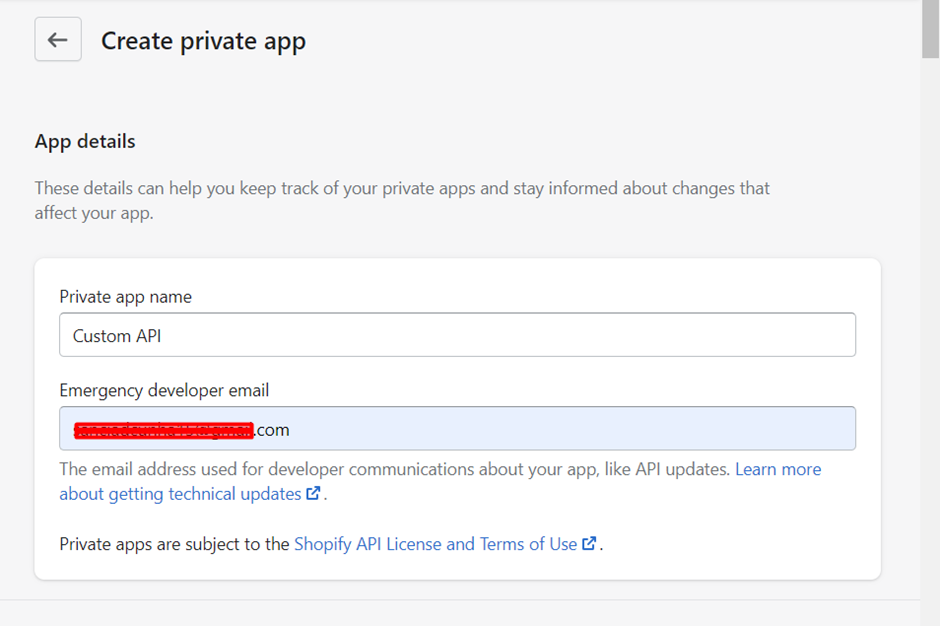
3. Provide app name and email
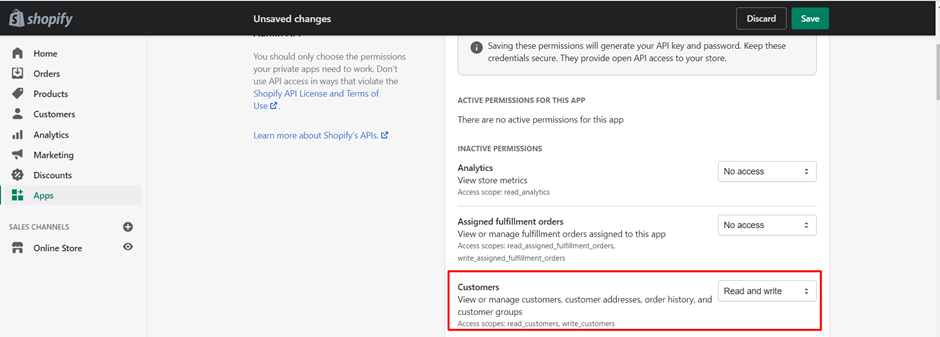
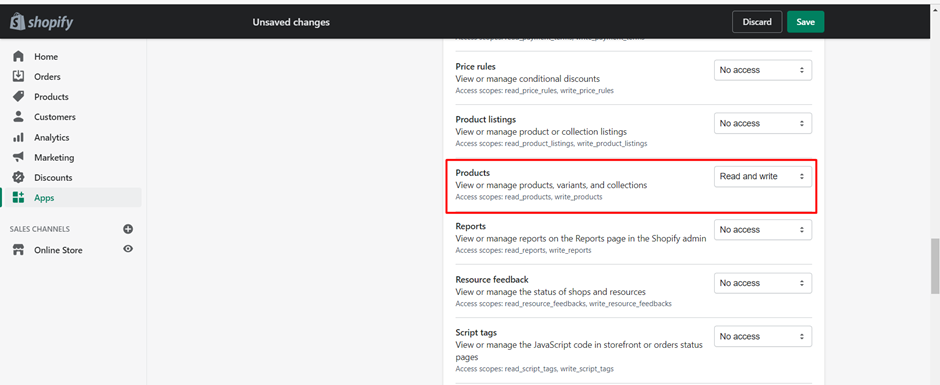
4. Give permissions based upon your requirements
No Access
Read Access
Read and write
5. Click on Save and then click on create new private app
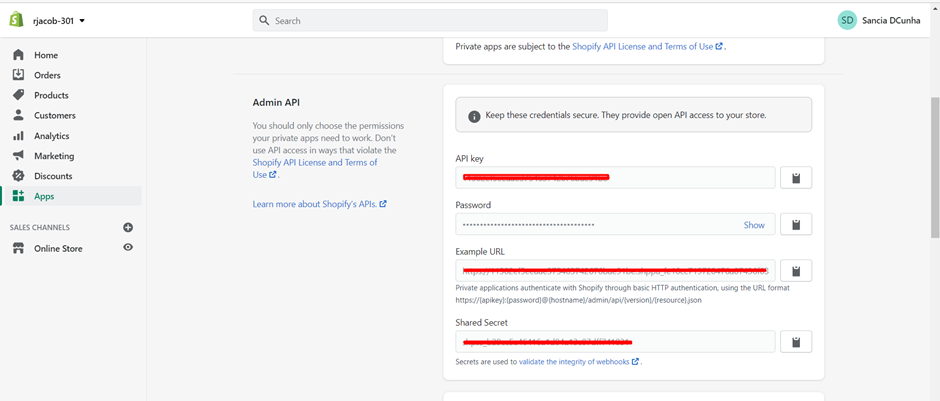
6. After creating app, we get API key, password and URL
Creating Custom Connector in Power Automate
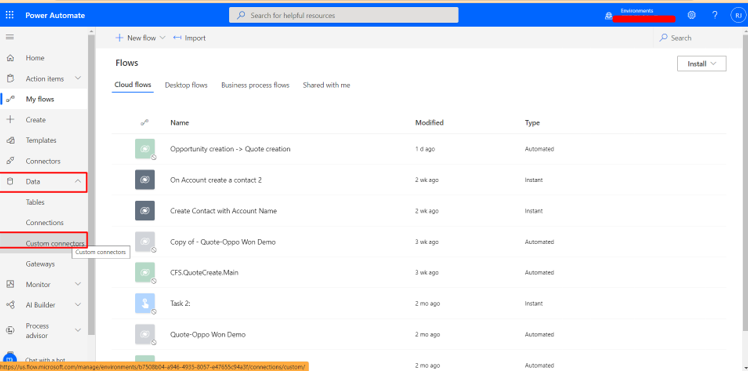
7. Go to Power Automate->Click on Data->Custom Connectors
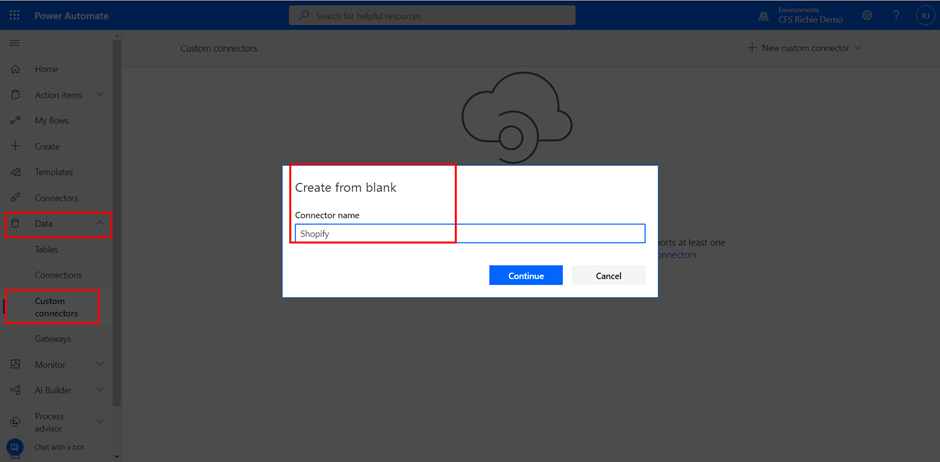
8. Click on “+ New custom connector” –> Create from blank. Give a name to your connector and click on “continue
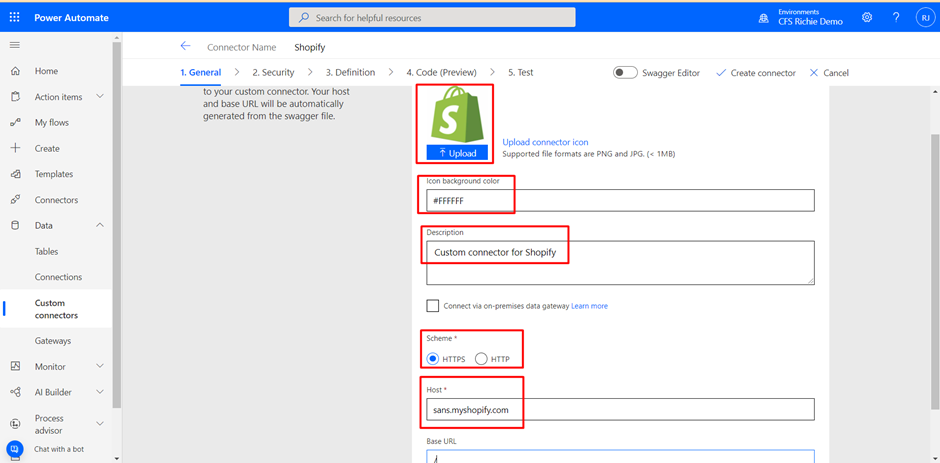
1. General
9. You can upload an image, background color and description as you want or desire
2. Security
10. Select Authentication type as “Basic Authentication” and give label to the parameters.

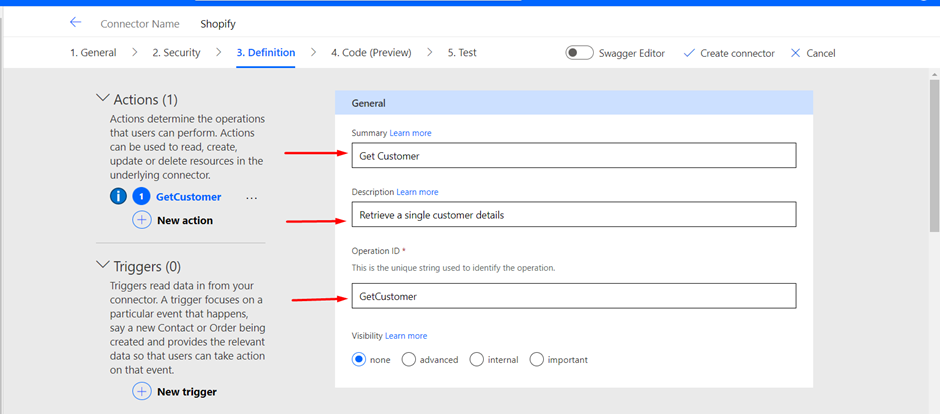
3. Definition
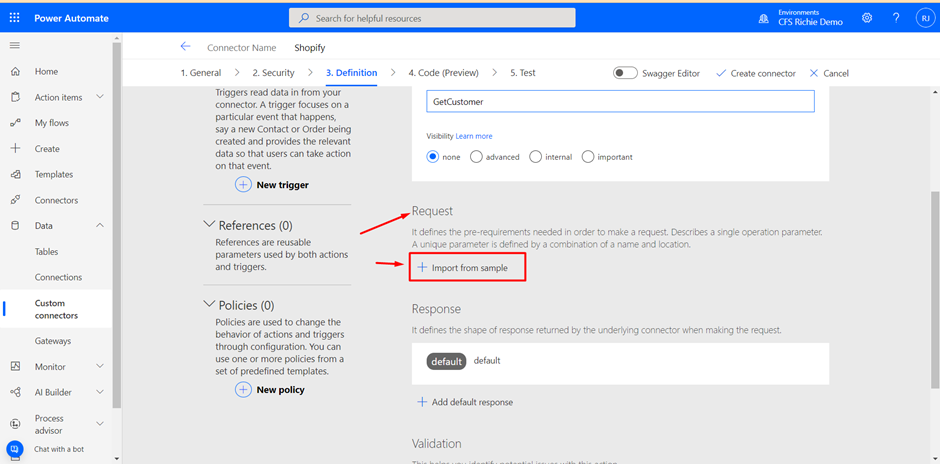
11. In Definition, you can create Triggers and Actions based on your requirements. Click on “New Action”
12. Enter Summary, Description and Operation ID
13. Go to Request and Click on “Import from sample”
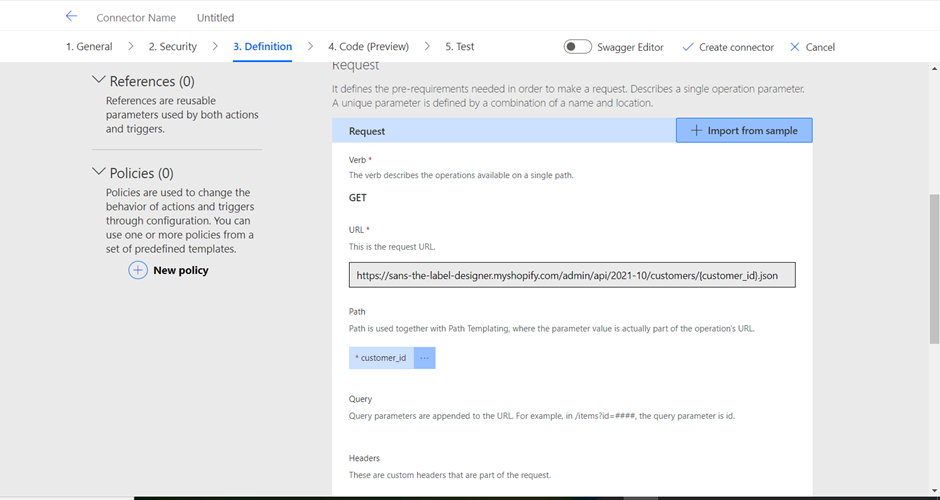
14. Enter the verb and Get request URL to retrieve the single customer detail
Verb: GET, URL: https://{apikey}:{password}@{hostname}/admin/api/2020-10/customers/{customer_id}.json
Example- https://9ed959ec1ed8536c82689353bf247c78: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@sans-the-label-designer.myshopify.com/admin/api/2021-10/customers/{customer_id}.json
Here, {Customer_id} is the input parameter.
A request would look like the one below-
Add response
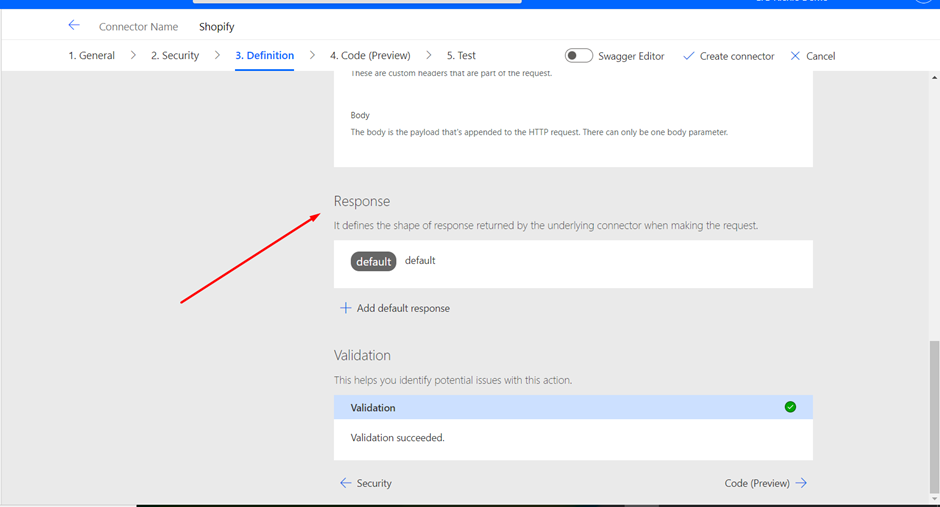
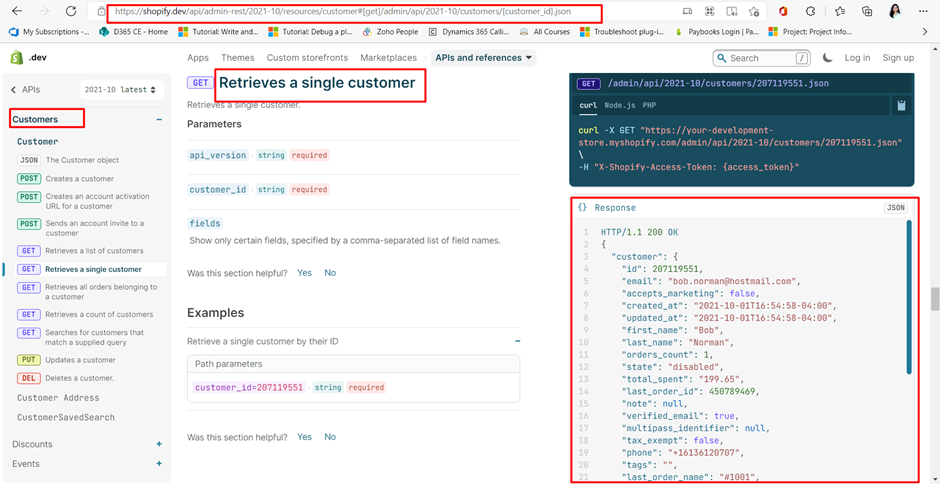
15. Go to Shopify API Documentation: Customer (shopify.dev) and copy the JSON file and enter it in Add default response->body

16. Click on Create Custom Connector
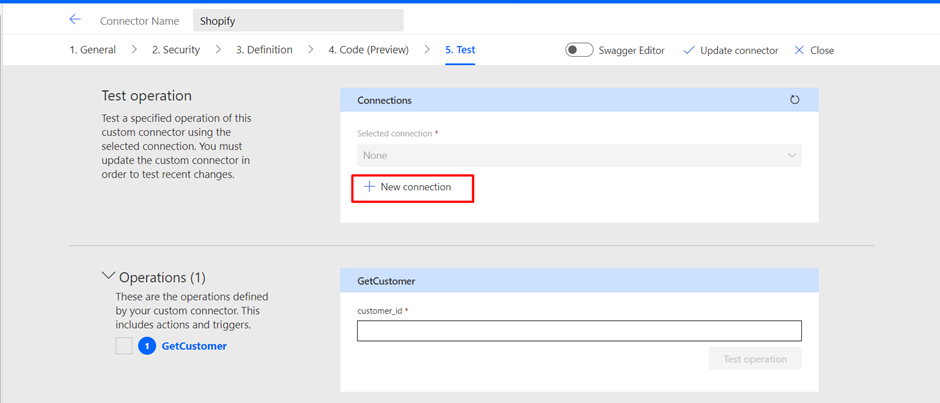
4. Test
17. Add a new connection
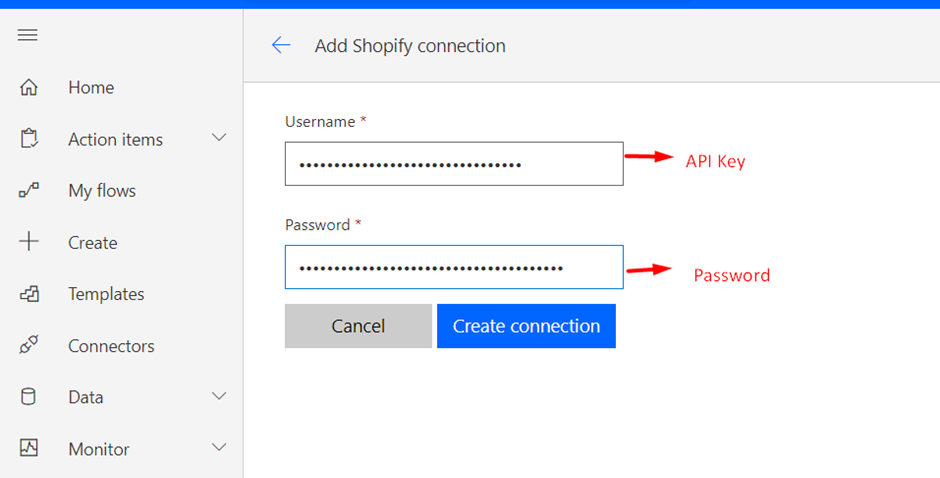
18. Enter the API key and password

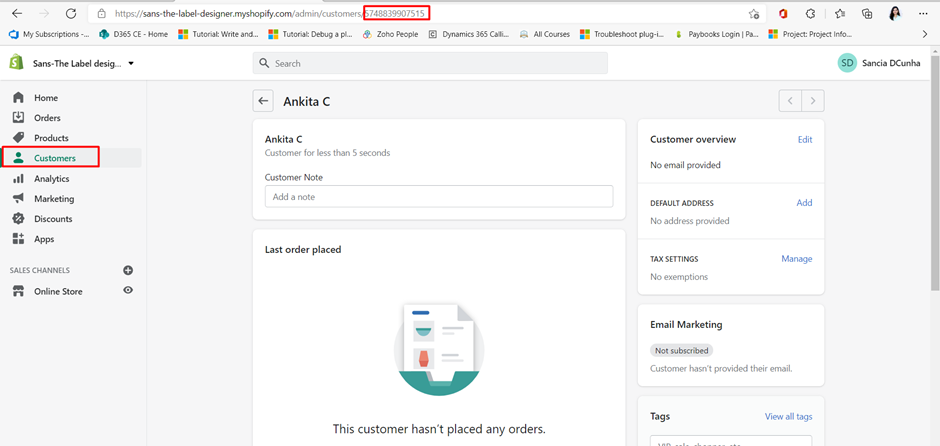
19 Create a new customer in Shopify app and enter the customer ID in GetCustomer
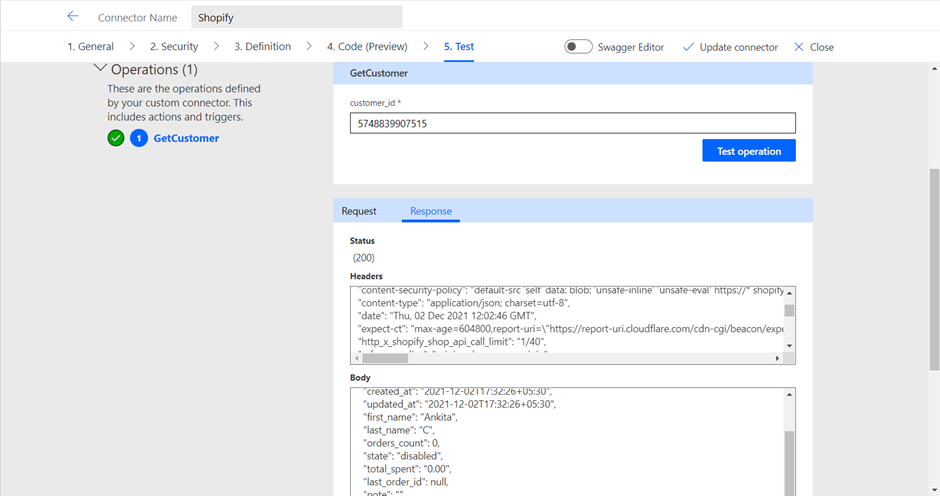
20. Click on “Test operation” to test your connector
Hope this helps!!