Creating a Custom Connector for retrieving a single record from Shopify
Hello everyone!
Shopify has become a powerful platform for companies to build their online presence and run their operations in the e-commerce space. Effectively maintaining consumer data is one of the most important aspects of running an online shop. In this article, we’ll show you how to build a custom connection to use a Postman collection to extract a single customer’s information from Shopify. You may easily get client information using this simplified procedure for better customer service and data analysis.
Let’s get started!
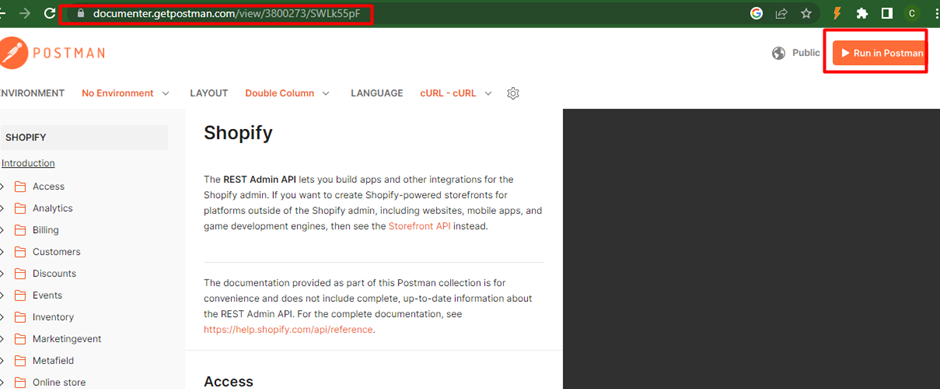
Click this link ‘https://documenter.getpostman.com/view/3800273/SWLk55pF’ to get the Postman Collection.
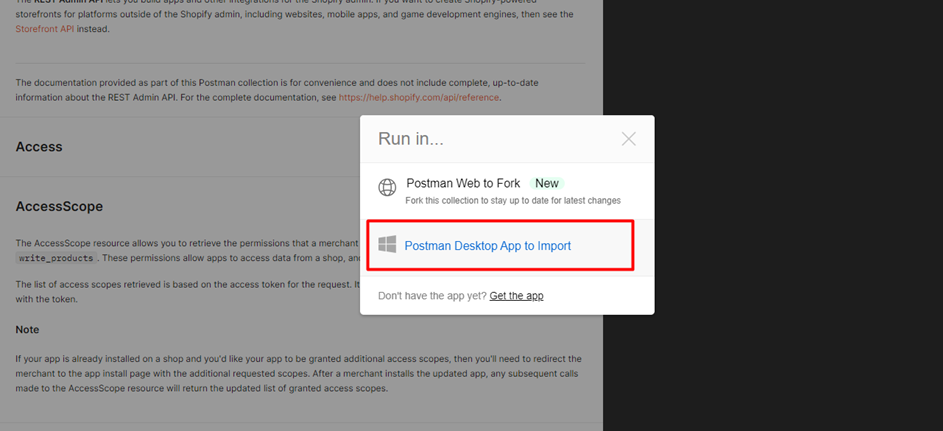
Click ‘Run in Postman’ button, select ‘Postman Desktop App to Import’ and select ‘Open App
Make sure Postman is installed in your device. Once this is imported, you will see the pre-built libraries.
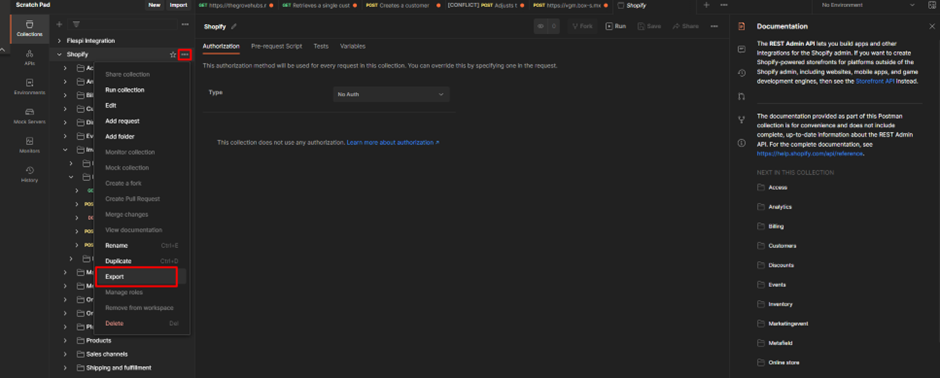
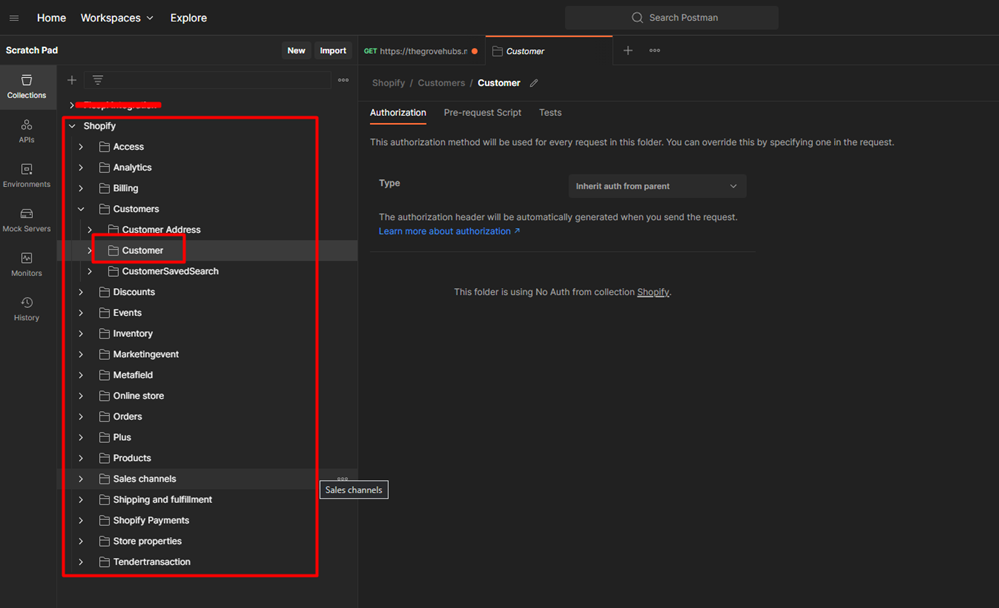
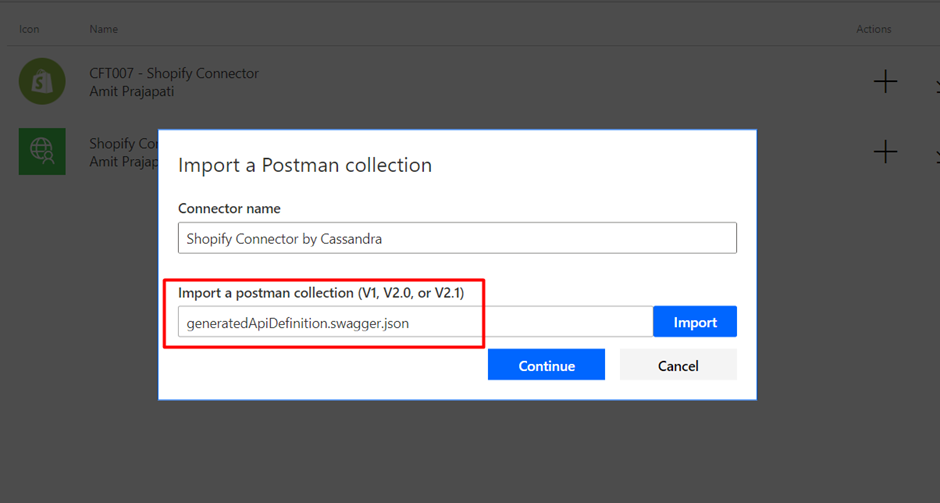
Export the Postman Collection and Select ‘Customer’
Imported the Collection which is exported which is in the swagger.json format
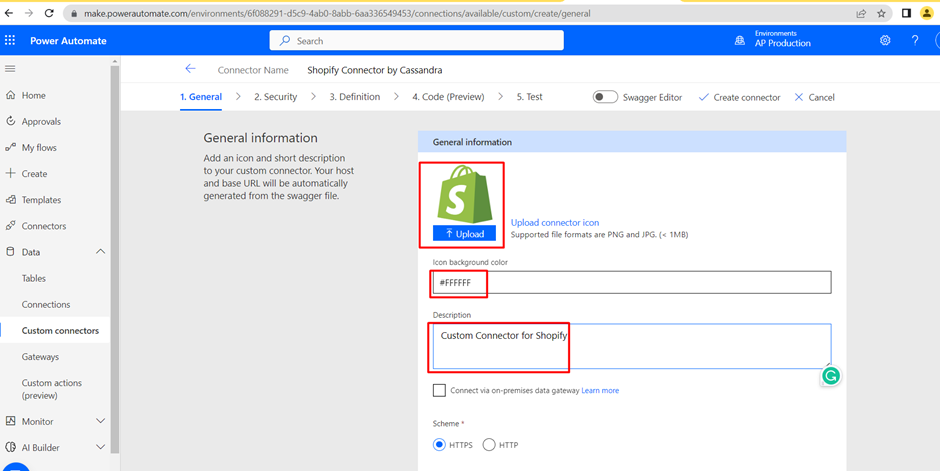
Add an image as the connector icon and description as shown below.
Add the host name and move to the next Section ‘Security’

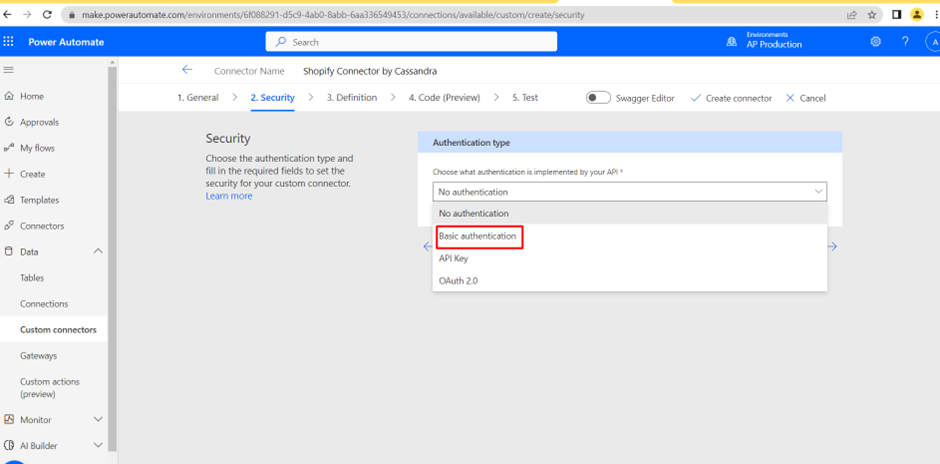
Select a type of Authentication. Here, in this case, I selected Basic Authentication.
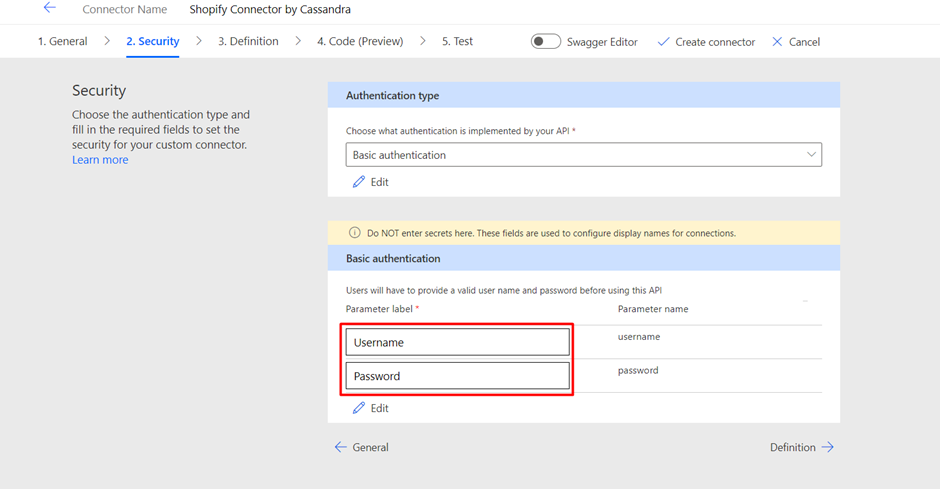
Basic Authentication involves Username and Password. Provide appropriate parameter labels.
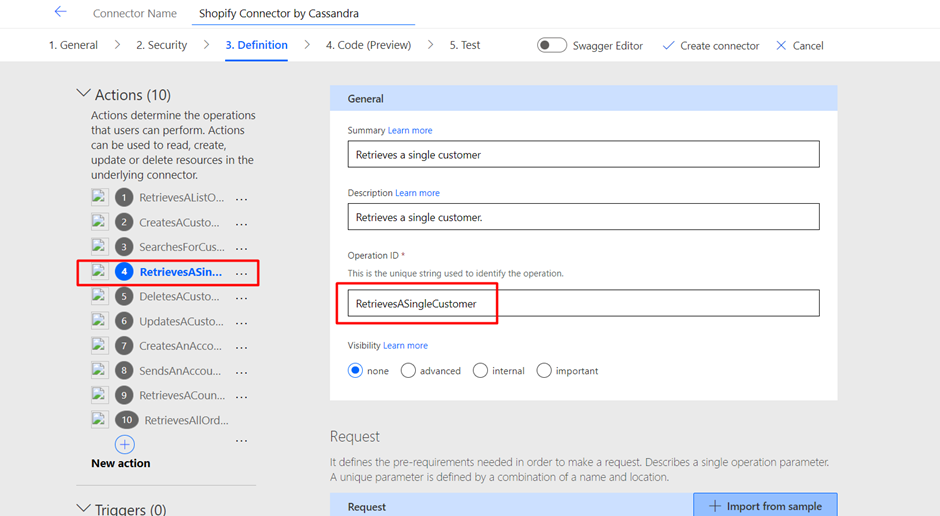
We can see the pre-defined Actions as we imported the postman collection. We will be retrieving details of a single customer so select ‘RetrievesASingleCustomer’.
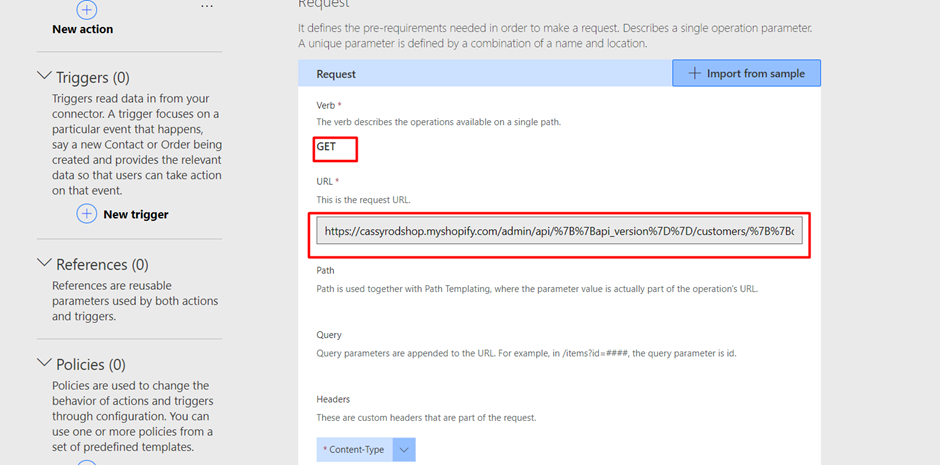
Enter the verb Get request URL to retrieve the single customer detail
Verb: GET, URL: https://{apikey}:{password}@{hostname}/admin/api/2020-10/customers/{customer_id}.json
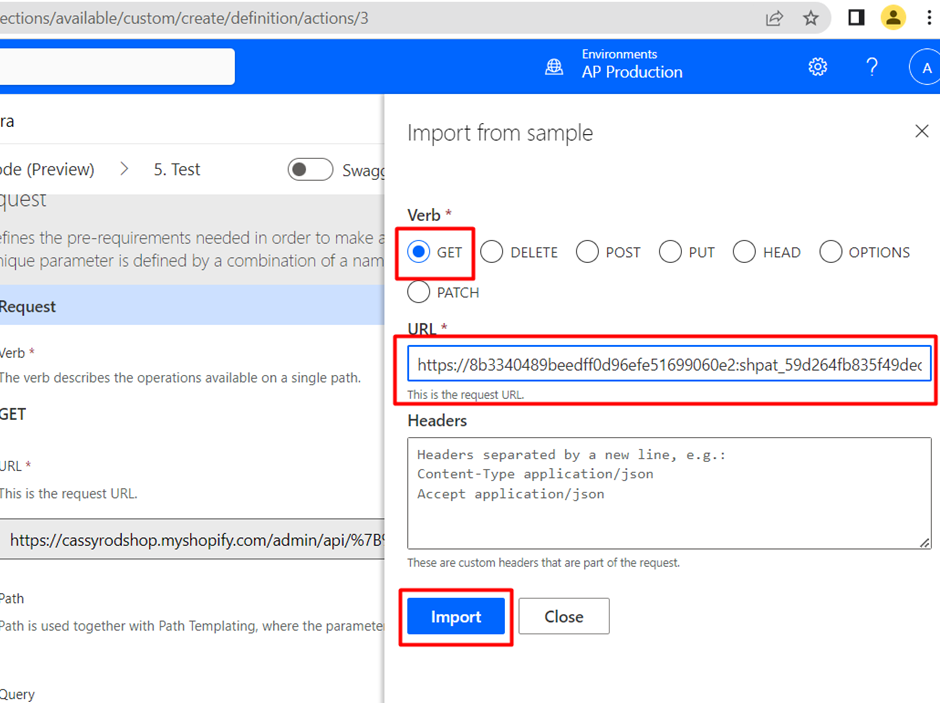
Paste this:
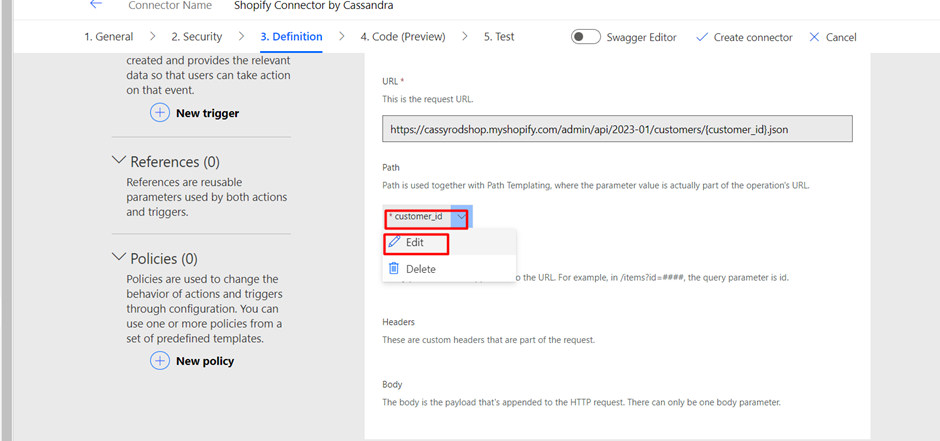
Here, {customer_id} is the input parameter. So, I have edited and pre-defined the Customer ID value.
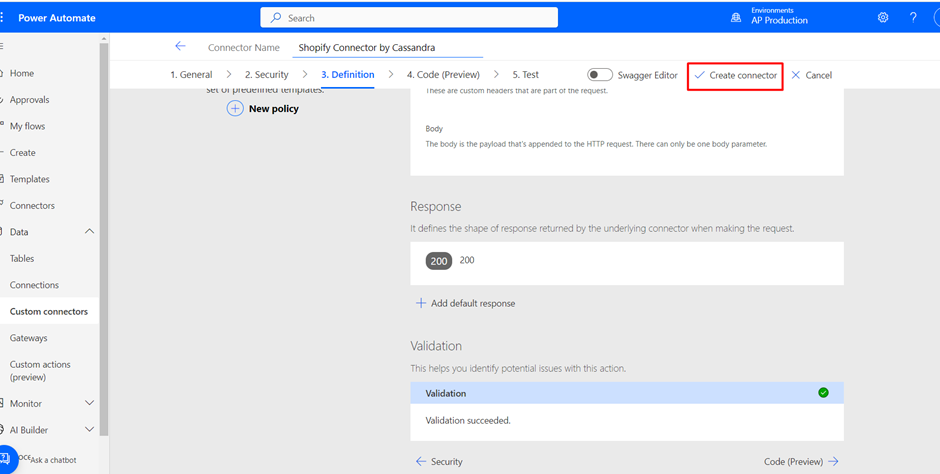
Click on Create ‘Custom Connector’
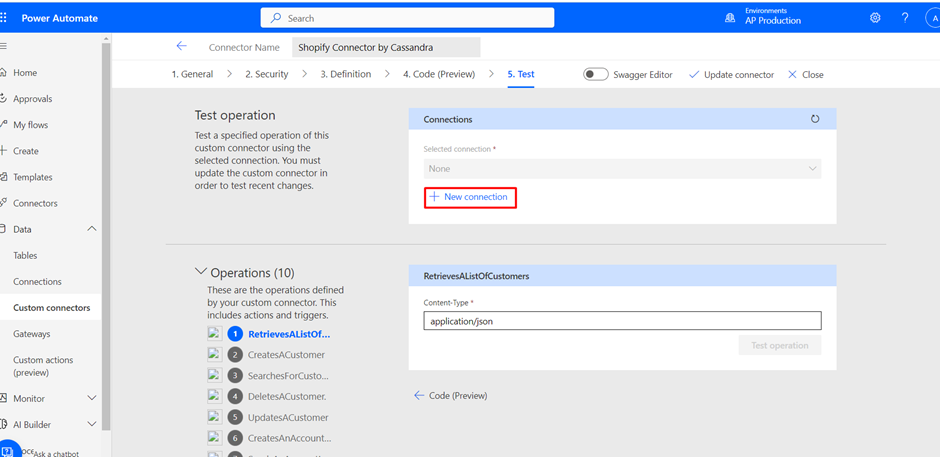
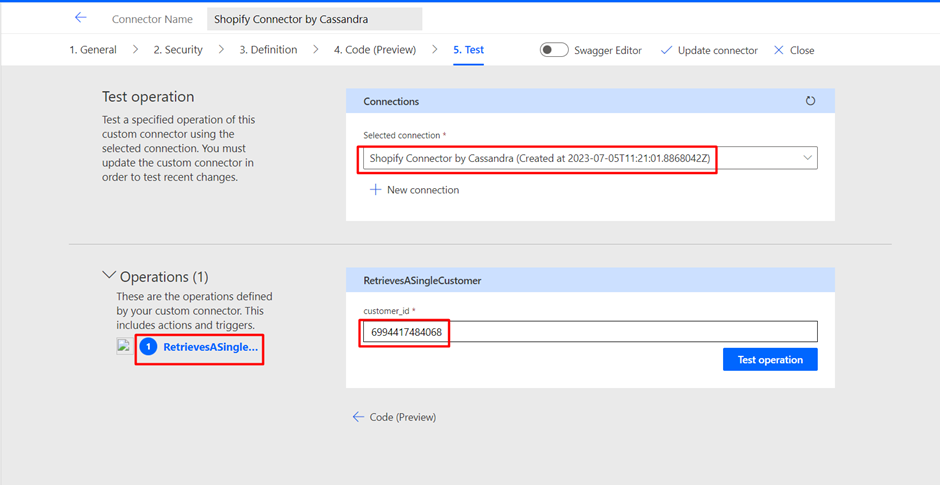
Add a new connection to test the connection.
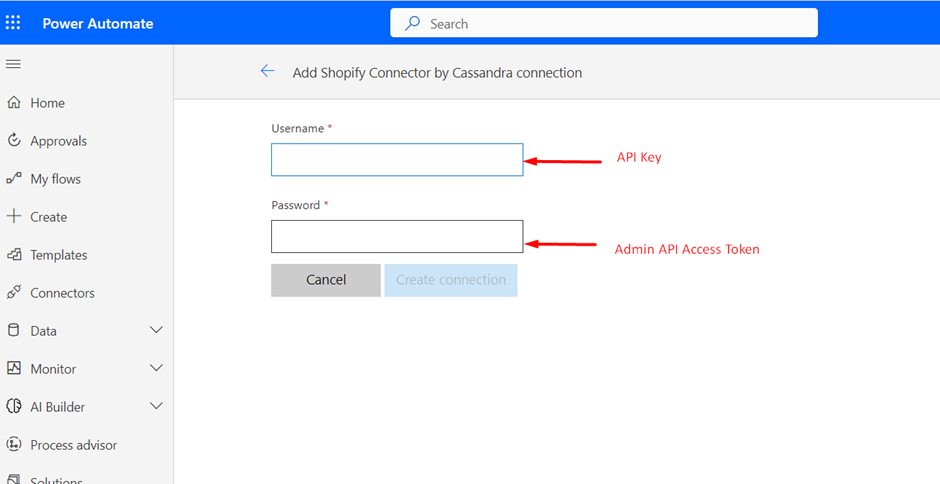
Enter the API Key as the Username and Admin API Access Token as Password. You will find this in your Shopify environment Developer Options.
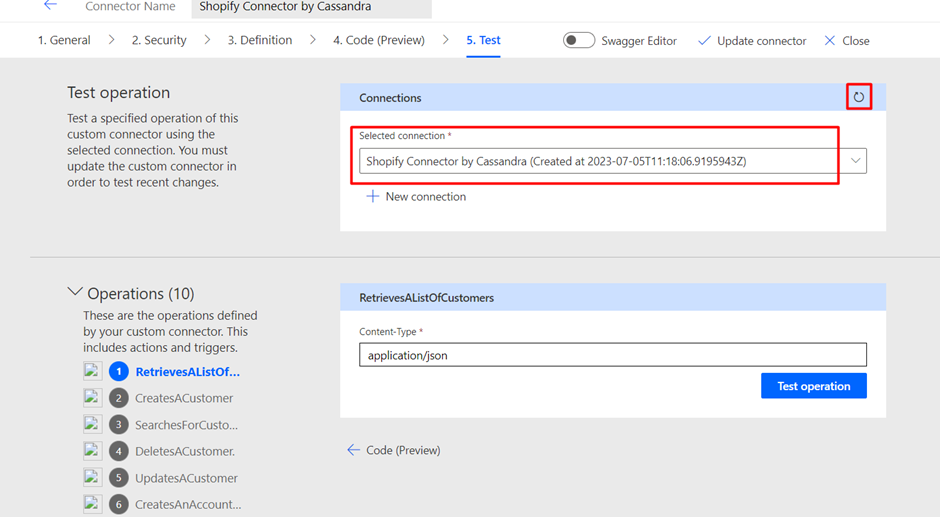
A connection is displayed here. If it doesn’t reflect, refresh the Connection.
Add the Customer ID here and click ‘Test Operation’.
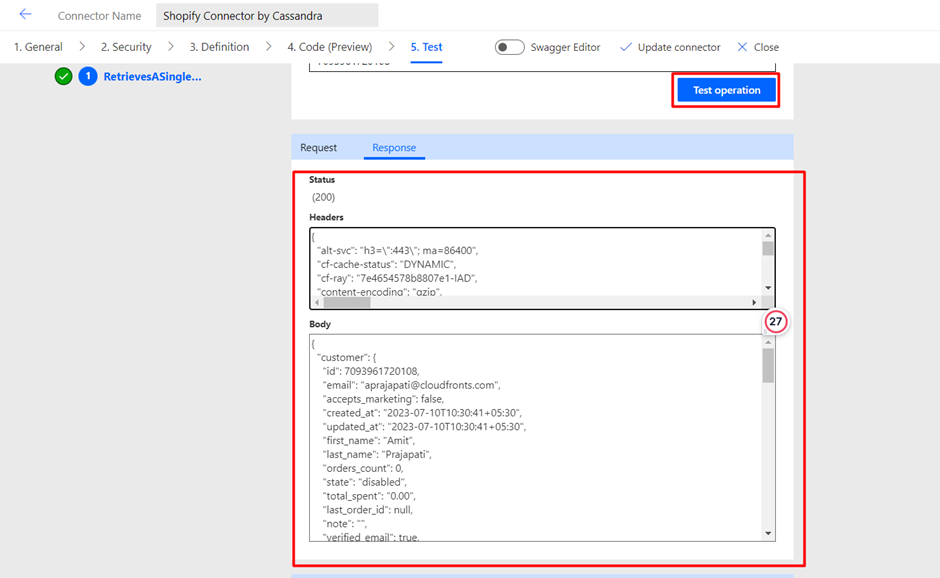
Voila, the response is successfully generated.
Hope this helps!